Nest Doorbell Install Manual
I Have 2 Nest Hellos And I Would Like Both To Ring On The Same Chime But One Is On A Power Adapter Google Nest Community

Nest Hello Chime Does Not Stop Ringing Google Nest Community
Doorbell Chime Is Buzzing Constantly 3 Months After Installation Google Nest Community
Installing Nest Hello Doorbells Youtube
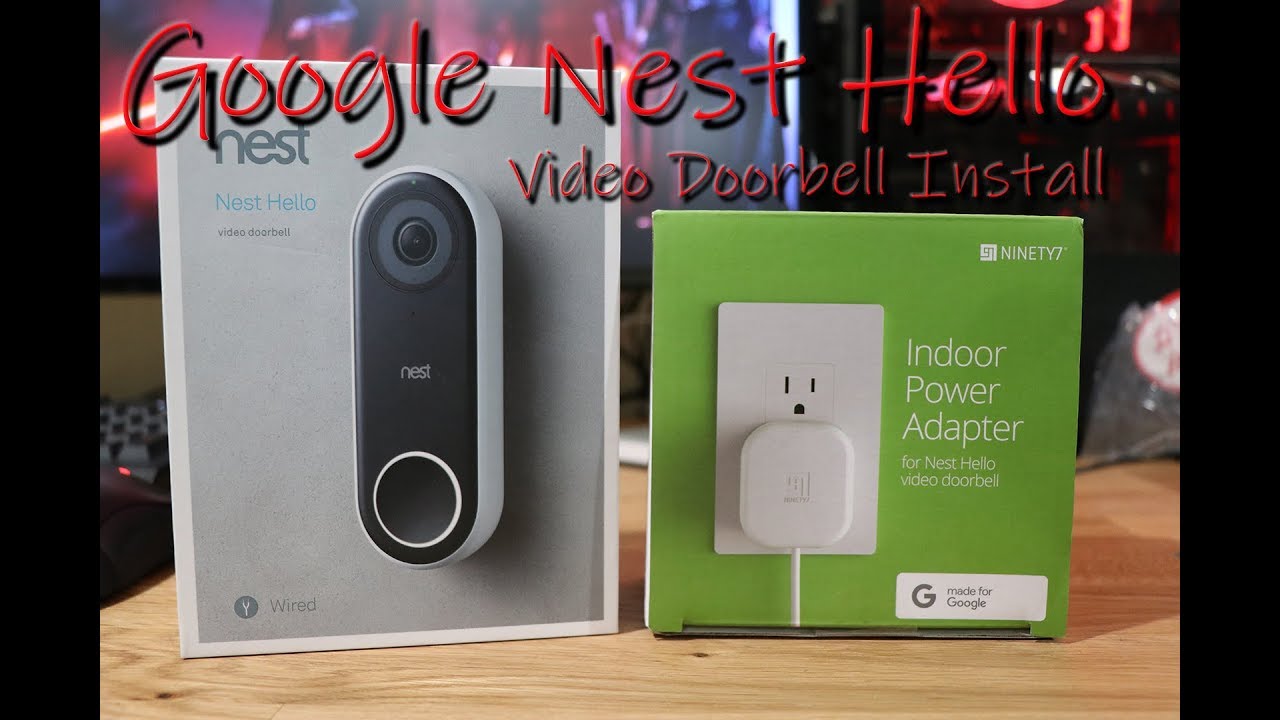
How To Setup And Install Nest Hello Video Doorbell With The Indoor Power Adapter Youtube
Install Problem With Nest Hello Doorbell Using Friedland D117 Chimer As Soon As I Press The Bell It Google Nest Community
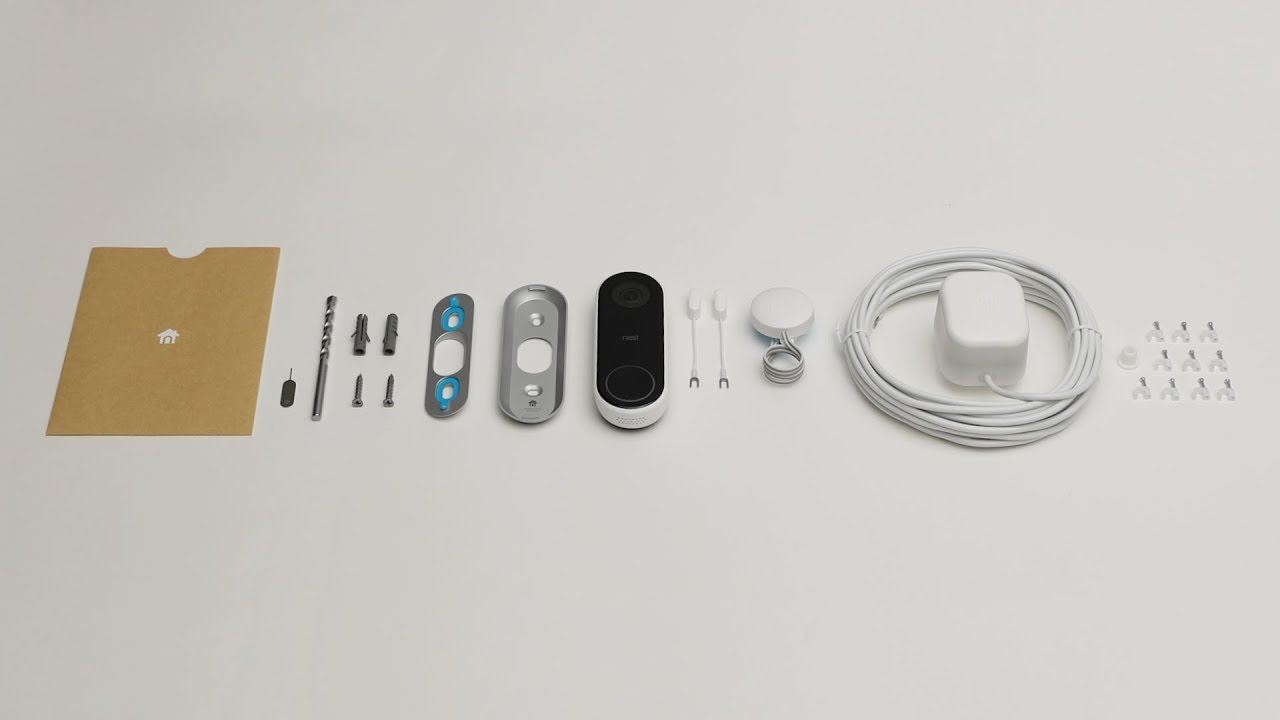
Grab the included screws and install the mounting bracket with the horizontal screw hole at the bottom.
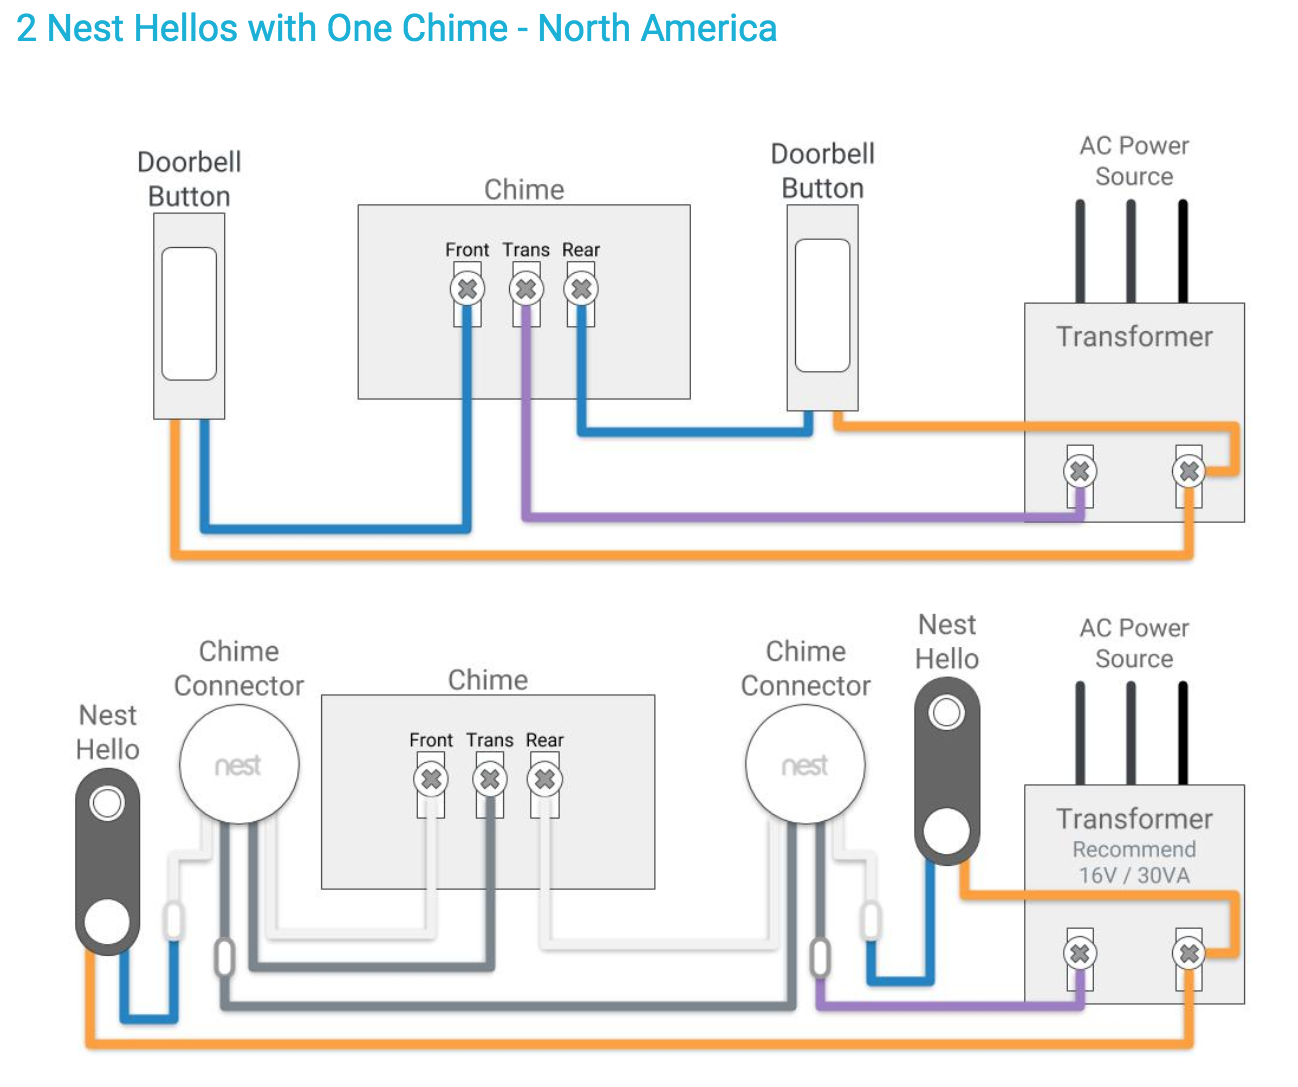
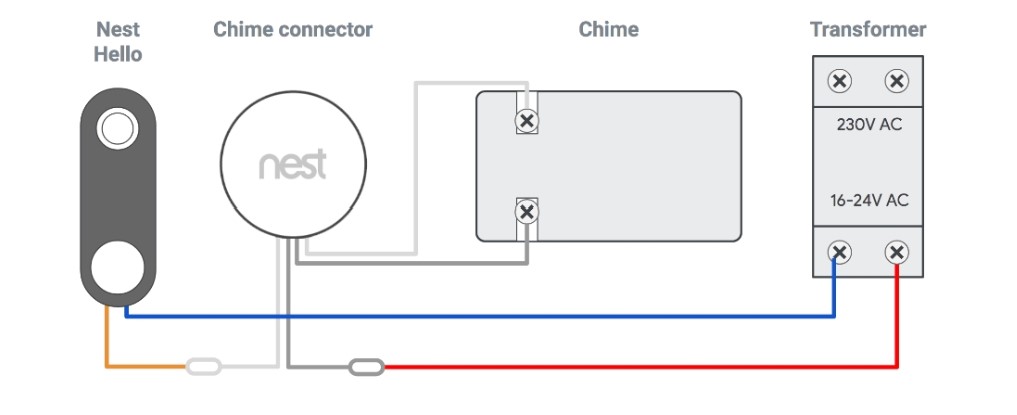
Nest doorbell install manual. Wire and install the chime connector at the chime box with nest hello successfully added to the nest app you are now ready to wire and install the chime connector. Use a level and adjust your bracket using the bottom screw. Nest hello is more than just a doorbell and requires a continuous power. If needed use the included 15 degree angle bracket if your nest doorbell is in a corner or close to a wall.
Page 11 consider the camera angle. The side you connect. After the qr scanning app will install the nest doorbell. D etermine if you need to use the enclosed 15.
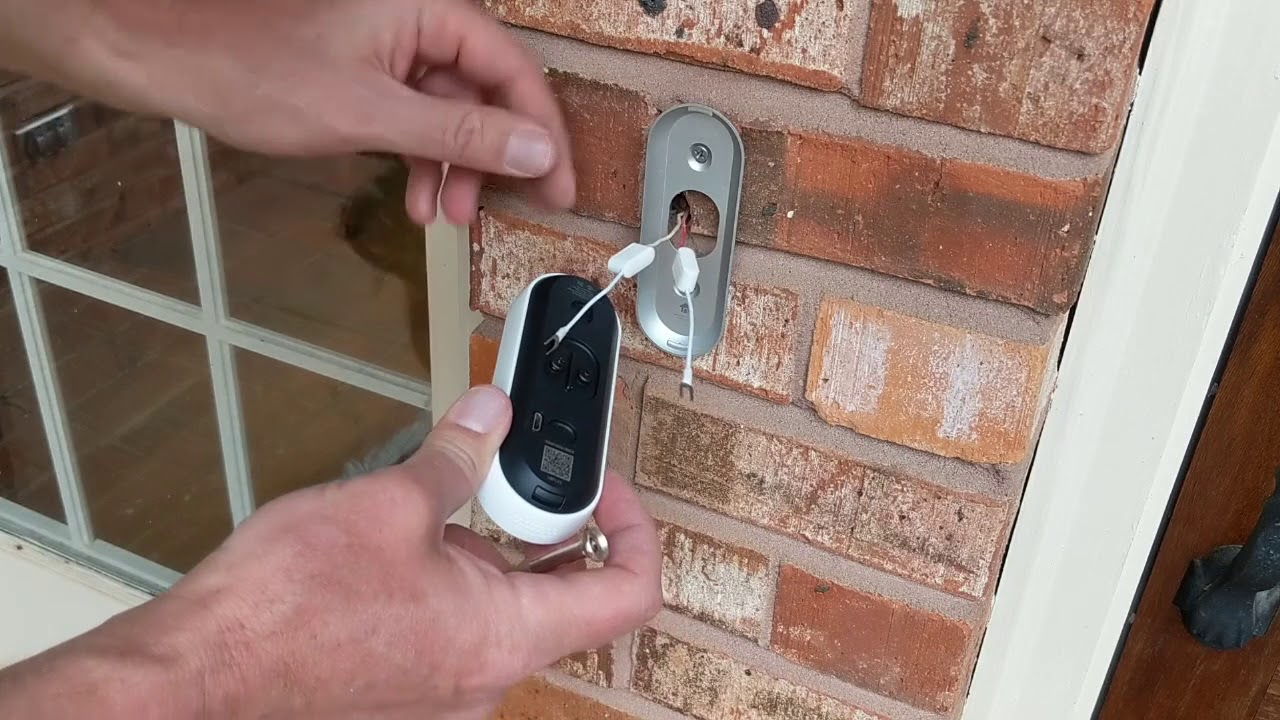
Install the back plate for the nest hello camera unit make sure it s plumb by using a level connect the low voltage wires to the back of the nest hello. And then you will be asked to scan the qr code and you can find it behind the body of the camera. Next the app will walk you through the steps to connect your chime wires. Install the mounting bracket.
Why a chime connector. If you are using nest product then click settings options which are on the left section of the navigation panel. Optional if your camera is perpendicular to your door like mine is you ll probably want to install the wedge plate.

Installation And Review Of The Nest Hello Video Doorbell Sam Kear
How To Install Nest Hello Video Doorbell Setup Guide

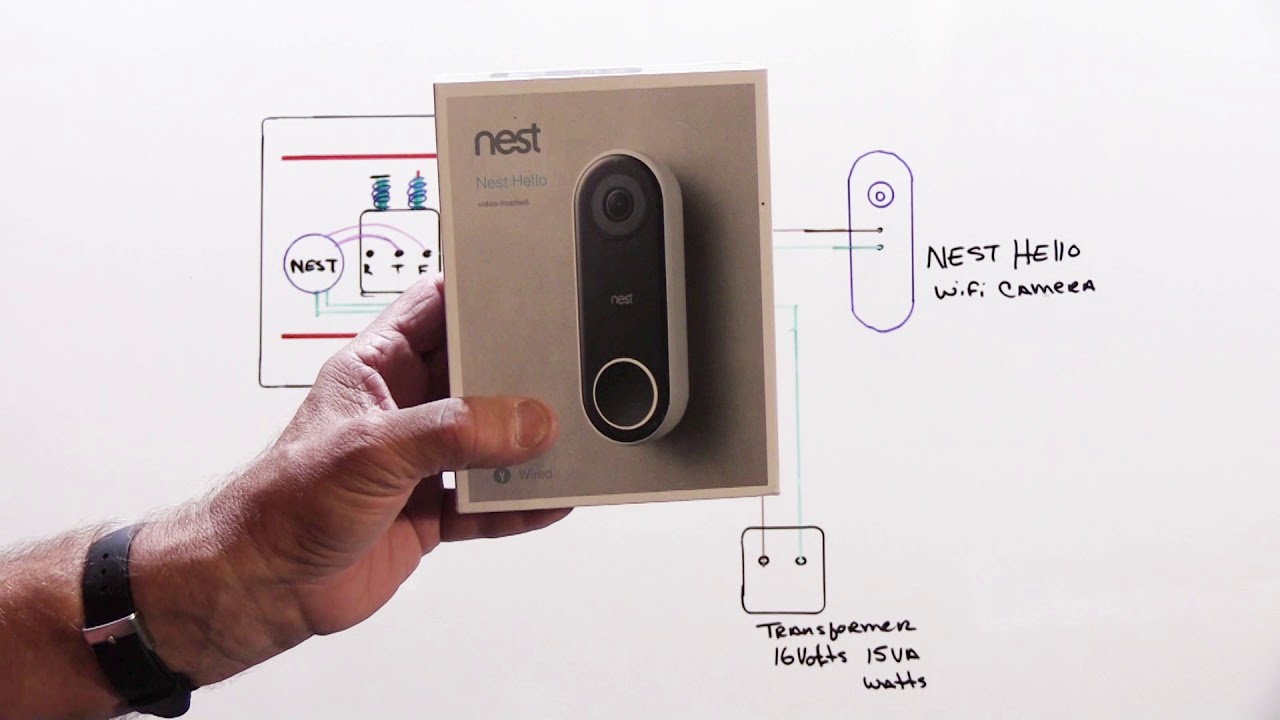
Nest Hello Advanced Wiring Diagram Youtube
Nest Hello Pro Installation Configuration Manual Pdf Download Manualslib

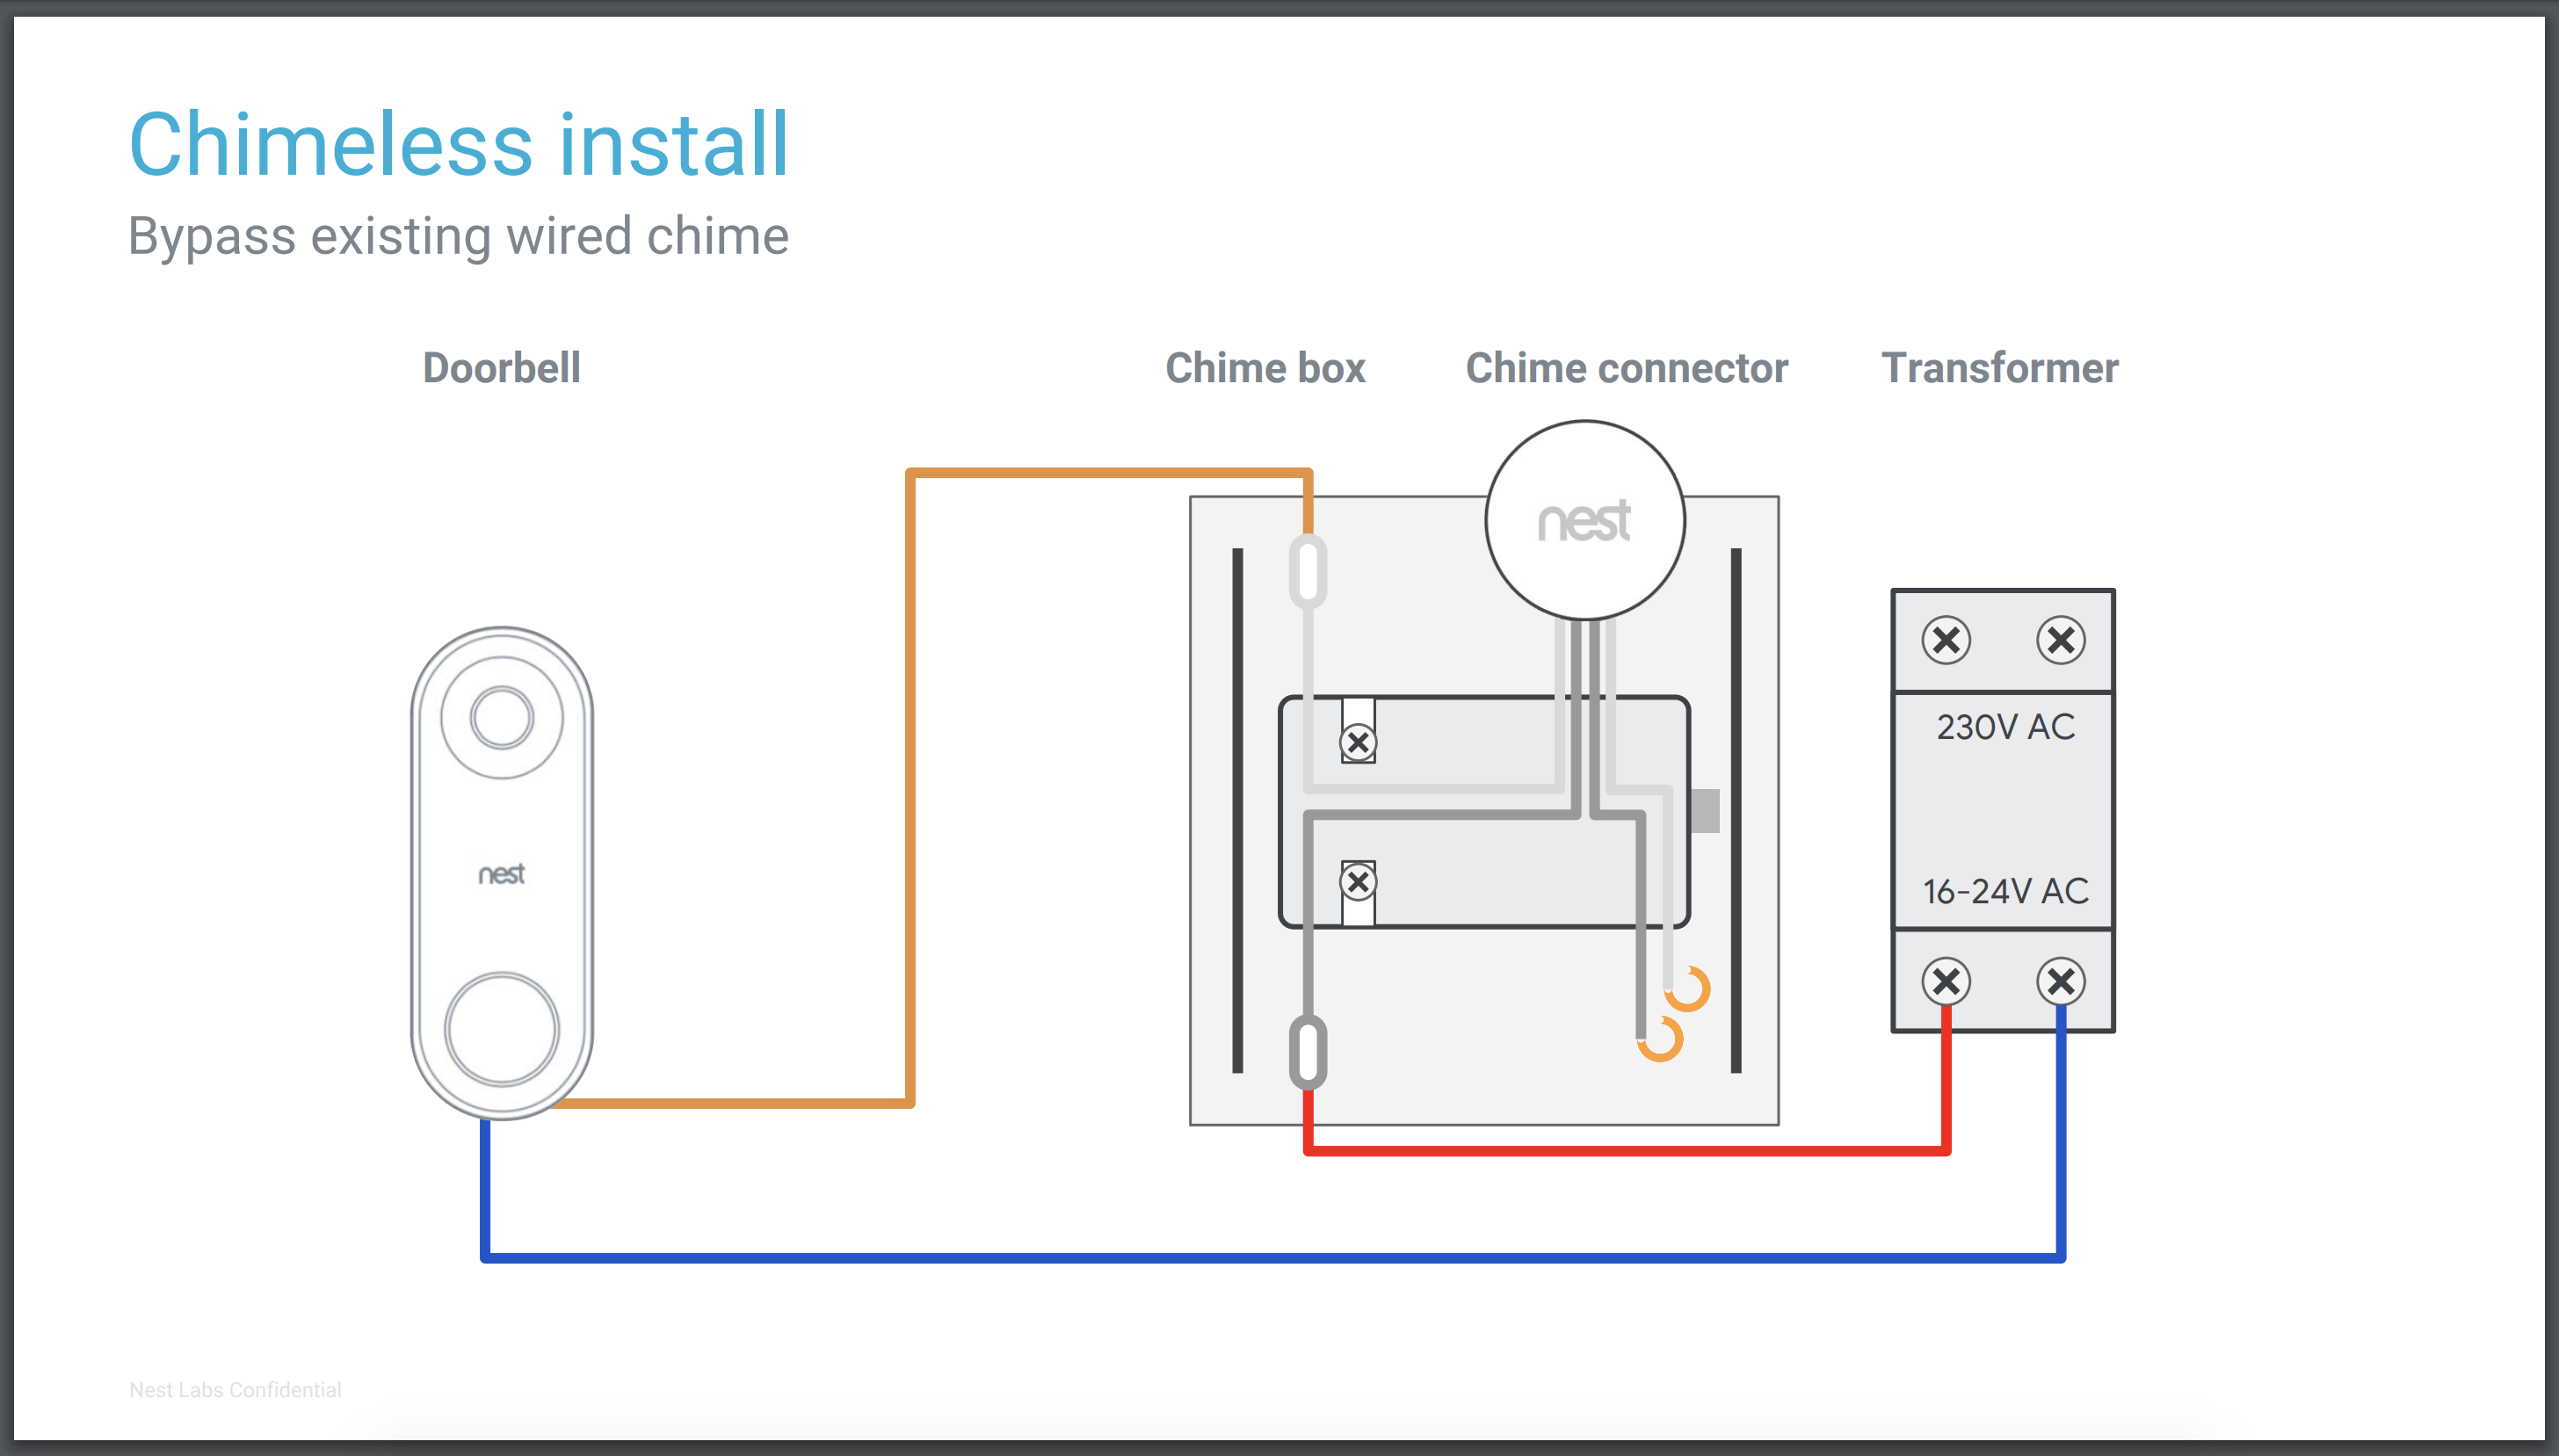
How To Install Nest Hello Without Chime Or Existing Doorbell Robot Powered Home

Nest Hello Wired Doorbell With Hd Video Camera Nc5100ef

Nest Hello Uk Install With Integrated Transformer 5 Steps Instructables
How To Set Up And Install The Nest Yale Lock Youtube

Quick And Easy Upgrade Nest Hello Doorbell Installation Instructions
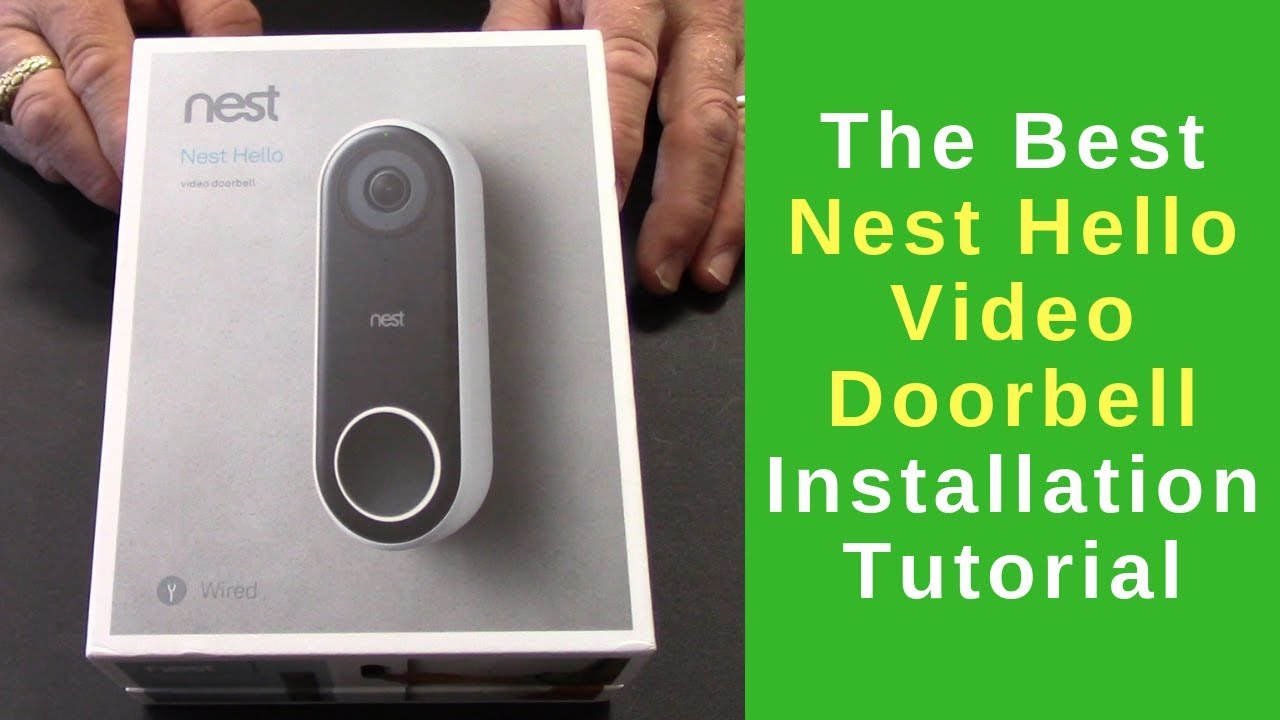
The Best Nest Hello Video Doorbell Installation Tutorial Youtube
Google Nest Hello Video Doorbell Install Smart Home Series 1 Youtube

Nest Hello Uk Wiring Without A Chime Doorbell Installation Youtube
Connecting A Nest Hello Wifi Door Camera To A Nutone Intercom System Or Electronic Door Chime Youtube

